


- This template for photography blogs
- Gallery Blogger Templates
- Black color, Dark Background.
- Fixed width, Right sidebar.
- 4 column, 1 sidebar
- this is professional template with a cool design, top navigation bar, search box, 4 columns..

Here is instruction to install this template
1,Download this template

2,Open template in any word editor you have .

3,To change logo and banner ,find this code
<div id="sitename">
                 <a class="name" expr:href='data:blog.homepageUrl'>
                      <span id="name1stRow">SIMPLEX</span>
                     <span id="name2ndRow">NEWSPAPER II</span>
                 </a>
             </div>
and change  <span id="name1stRow">SIMPLEX</span>
                     <span id="name2ndRow">NEWSPAPER II</span> to your logo

4,Find this code :
<ul>
<li><a href="" class="gab_rss">Latest Posts in RSS</a></li> <li><a title="" rel="nofollow" href="" class="gab_rss">Latest Comments in RSS</a></li> <li><a title="" rel="nofollow" href="" class="gab_email">Subscribe by e-mail</a></li> <li><a title="" rel="nofollow" href="http://www.twitter.com/dinhquanghuy" class="gab_twitter">Follow us on Twitter</a></li> <li><a title="" rel="nofollow" href="http://www.facebook.com/contact.dinhquanghuy" class="gab_facebook">Connect on Facebook</a></li> </ul>
and change the link to your social network account .
6,To show categories in homepage ,find this code :
label1 = "finance";
Title1 = "FINANCE";
label2 = "travel";
Title2 = "TRAVEL";
label3 = "breakingnews";
Title3 = "BREAKING NEWS";
label4 = "technology";
Title4 = "TECHNOLOGY";
label5 = "business";
Title5 = "BUSINESS";
label6 = "africa";
Title6 = "AFRICA";
label7 = "asia";
Title7 = "ASIA";
label8 = "americas";
Title8 = "AMERICAS";
label9 = "europe";
Title9 = "EUROPE";
label10 = "racing";
Title10 = "RACING";
label11 = "football";
Title11 = "FOOTBALL";
label12 = "basketball";
Title12 = "BASKETBALL";
label13 = "swimming";
Title13 = "SWIMMING";
label14 = "gallery";
Title14 = "GALLERY";
label15 = "feature";
Title15 = "FEATURE";
and change value of each label and title variable to the category you want
to show latest posts in homepage . Position of each label is in picture bellow :

.pagenavi {
background:none repeat scroll 0 0 #F7F7F7;
border-bottom:1px solid #ECEDE8;
border-top:1px solid #ECEDE8;
color:#777777;
height:30px;
margin:0;
text-align:center;
width:100%;
}
and change it to
.pagenavi {
background:none repeat scroll 0 0 #F7F7F7;
border-bottom:1px solid #ECEDE8;
border-top:1px solid #ECEDE8;
clear:both;
color:#777777;
height:30px;
margin:0;
text-align:center;
width:100%;
}
I was inspired by two Joomla template : Worldnews (from Gavick) and Teline (joomlart) ,so I design this template . It's named Simplex Enews . It's clean and simple , widget and ads slot ready for you . Do you like it ? if you answer 'yes' and wanna install this template ,here is my instruction :
1,Download template file .
2,Open template in any word editor you have
3, To change logo ,find this code :
#image-logo a { background:url(http://img828.imageshack.us/img828/6954/simplexenews.png) no-repeat left -5px; width:300px; height:100px; text-indent:-5555em; overflow:hidden; }
and change the url of background image to your logo url
4, To change social network link ,find this code :
<ul class="topnav top-social">
<li><a class="top-rss" href="http://feeds.feedburner.com/simplex">RSS</a></li>
<li><a class="top-email" href="http://feedburner.google.com/fb/a/mailverify?uri=simplex&loc=en_US">Email</a></li>
<li><a class="top-twitter" href="http://twitter.com/dinhquanghuy">Twitter</a></li>
<li><a class="top-facebook" href="http://www.facebook.com/contact.dinhquanghuy">Facebook</a></li>
</ul>
Change the links in href attribute to your social network account .
5,To show categories in homepage ,find this code
label1 = "world";
Title1 = "WORLD";
label2 = "US";
Title2 = "US";
label3 = "entertainment";
Title3 = "Entertainment";
label4 = "business";
Title4 = "Business";
label5 = "Sports";
Title5 = "Sports";
label6 = "tech";
Title6 = "Technology";
label7 = "Feature";
Title7 = "Feature";
label8 = "Topnews";
Title8 = "Latest News";
label9 = "headline";
Title9 = "Headline";
label10 = "editor";
Title10 = "Editor's picks";
label11 = "story";
Title11 = "Top Stories";
position of each label showed in picture bellow
You can change the value of each label from label1 to label11 to the category you want to show in homepage .For example ,you want to show the category 'world' in possition of label1 ,change the value of label1 to 'world' .
Or if you want to show category ' xyz ' to slider in homepage ( position of label7) ,just change the value of label7 to 'xyz' .
Title is the text that showed as title of category in homepage .Change it to what you want .
6, To add photos from your Flickr to blog ,just find this code :<script type="text/javascript">
$(document).ready(function(){
$('#photoflickr').jflickrfeed({
limit: 9,
strings: {
id: '37304598@N02'
},
itemTemplate: '<div class="flickr_badge_image"><a href="{{image_b}}"><img width="75" height="75" src="{{image_s}}" alt="{{title}}"></a></div>'
});
});
</script>
and change the value of id from '37304598@N02' to your flickr account id .
7,To change the bio of writer ,find this code :
<div class="clear" id="entry-author"> <div id="author-avatar"> <img width="60" height="60" src="http://0.gravatar.com/avatar/4c2ed72c6be86742f05e9750110d5731?s=60&d=http%3A%2F%2F0.gravatar.com%2Favatar%2Fad516503a11cd5ca435acc9bb6523536%3Fs%3D60&r=G" alt=""/> </div> <!--end .author-avatar--> <div id="author-description"><h3>About author</h3Curabitur at est vel odio aliquam fermentum in vel tortor.Aliquam eget laoreet metus. Quisque auctor dolor fermentum nisi imperdietvel placerat purus convallis. </div> <!--end .author-description--> </div> <!--end .entry-author-->
and change as you want . That's all for editing ,save template and upload it to Blogger .
8,Go to Blogger Dashboard,continue to Page element .
9,To show category in navigation bar ,click on edit button on menu widget and add link to your category . Link to a category in Blogger has structure : "http://your blog. blogspot.com/search/label/your_category"
Do the same for category bar in footer and sidebar .
10,To add video ,click on video wiget ,and paste the embed code of video ,the size for video is 280x250 ,so you need to adjust your embed code for showing video at this size .
11,There are many ads widgets ,you can click on edit link in each widget for adding your ads code .
12,Save template and you are done .
Ps: many of my templates using fluid width ,so elements will be mess up if they have no content . I can use fixed size for making an element stick in a specific position ,but they won't show yours content enough if it longger than element size or size of browser windows are different .
So if you see your blog messed up after install ,pls make some content ,and itwill show up .For example ,if your blog has only 6 post ,to see template in well condition ,pls add the same label to 6 posts ,and change value of all label variables (from label1 to label11) in step 5 to this label ,you will see elements in its position .
This way applied to all of my template if you see it messed up .
Note : if you don't see page navigation bar in bottom of category page (Newer posts,older posts,home) ... You can :
-Open template in word editor ,find '.pagenavi' and it will lead you to CSS code of page navigation bar ,add these attribute : text-align:center;clear:both;
-Find <div class='pagenavi' id='blog-pager'> and delete id='blog-pager' to <div class='pagenavi'>
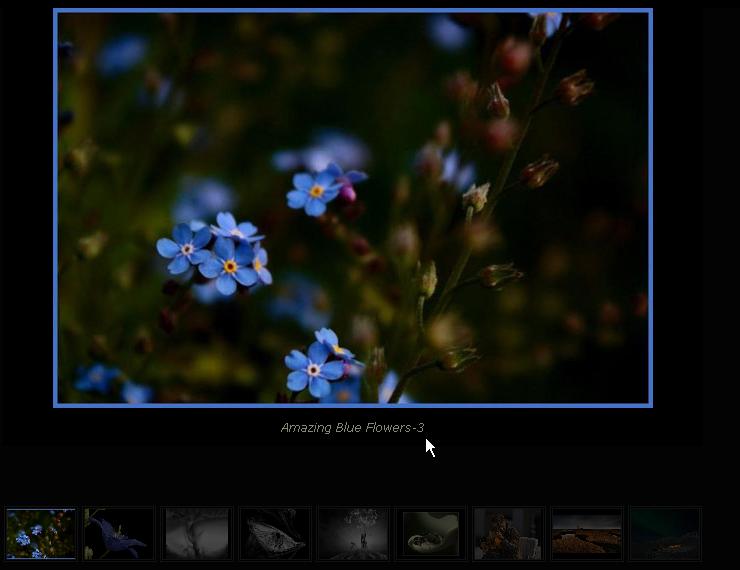


If you are familiar with my templates ,you will see install this template is very similar .

1,Download template file .

2,Open template file in any word editor you have.

3,To change logo ,find this code :
<div style="padding: 15px 0pt 0pt 30px;" id="logo">
<img src="http://img828.imageshack.us/img828/411/simplex.png"/></div><!-- /logo -->
replace the link in bold to your logo's link .
4,To show your flickr image ,find this code :
<script src="http://www.flickr.com/badge_code_v2.gne?count=6&display=latest&layout=x&source=user&user=24113168@N03&size=s" type="text/javascript"></script>
and change the user value (in bold) to your Flickr id .
5,To show posts in categories in homepage ,find this code
label1 = "europe";
Title1 = "EUROPE";
label2 = "asia";
Title2 = "ASIA";
label3 = "breakingnews";
Title3 = "BREAKING NEWS";
label4 = "business";
Title4 = "BUSINESS";
label5 = "entertainment";
Title5 = "ENTERTAINMENT";
label6 = "finance";
Title6 = "FINANCE";
label7 = "travel";
Title7 = "TRAVEL";
label8 = "americas";
Title8 = "AMERICAS";
label9 = "basketball";
Title9 = "BASKET BALL";
label10 = "racing";
Title10 = "RACING";
label11 = "football";
Title11 = "FOOTBALL";
label12 = "swimming";
Title12 = "SWIMMING";
label13 = "gallery";
Title13 = "GALLERY";
label14 = "feature";
Title14 = "FEATURE"; and change value of each label and Title variables to your categories .Position of labels are in picture bellow : 
When you finish ,save template and upload it to Blogger .

6,Go to Dashboard ,continue to Page Element .

7,There are many place you can add adverts to . You can click on edit link in Topads,ad125px,sidebarads,
belowfeaturead,seconrightads and footerads to insert your ad code (for example Google Adsense...)
8,You can add link to categories using Topcategory widget .Click on edit link in widget and add link to each category in your blog .Link to category has structure : http://yourblog.blogspot.com/search/labelyour_category
9,You can add any link you want in FooterLinks and Featurelinks widget .
10,To add video to blog ,click on dailyvid widget and paste your video embed code .Size for video is 300x250
11,Save template and we are done .
Note :
-Like any template of mine ,you need to fill each category with posts to see template in work well condition. If not ,you will see errors .
-You can translate text easily by finding the word you need to translate with search function of word editor .It will lead you to where the text is .
Akhirnya hasrat itu datang lagi, eit.. bukan hasrat yang aneh-aneh lho 
The mez template akan segera di luncurkan apabila semua infra strukturnya sudah siap. Klik pada gambar berikut untuk melihat live demo :

* Light weight
The mez hanya sedikit menggunakan sedia media gambar sebagai latar, oleh karenanya sangat ringan untuk di akses.
* Auto Readmore
Yang tidak suka ribet urusan read more, the mez telah di lengkapi dengan fitur Auto read more, walaupun nanti akan tersedia juga versi normal tanpa script auto readmore. Satu lagi, script auto read more ini sudah di kondisikan agar tidak konflik dengan Halaman statis.
* CSS sprite Subscribe icon
Icon subscribe atau berlanggan telah mengadopsi teknik CSS sprite sehingga menghasilkan efek hover yang manis namun tetap ringan di load.

* Easy Add menu Links
Salah satu ketidak nyamanan bagi para pemula adalah mengedit link pada menu navigasi karena harus membuka file HTML yang begitu rumit, dengan dengan The mez tidak lagi, karena telah di rancang agar link bisa di masukan dengan mudah melalui Elemen Halaman.


* Mini Icon
Anda dapat menyisipkan mini icon sebagai pemanis pada elemen yang di sukai.

* Easy Remove Hide Navbar script
Bagi anda yang khawatir apabila menghilangkan navbar blogger, anda bisa menghilangkannya melalui Elemen Halaman. Hapus elemen halaman yang ada dan navbar blogger akan bisa tampil secara normal.

Bagi anda yang bersedia menjadi sponsor akan template ini, tersedia dua link sponsor yang akan di pasang pada bagian footer dan akan bersifat life time.
Yang berminat silahkan hubungi kang Rohman yah, siapa cepat dia dapat karena tempat terbatas
The mez template yang ini adalah versi yang pertama. Mungkin untuk kedepannya akan dibuat beberapa variasi seperti dibuat dengan layout sidebar di kiri, versi magazine style, tersedia dengan warna yang yang lain dan lain sebagainya, ditunggu saja deh.
Apa pendapat anda tentang The mez Template? silahkan komentar.


